Over time, all air mattresses lose part of their initial inflation. It’s also possible that you have a hole in your air mattress, which will cause it to deflate or lose too much air. A patch kit or a do-it-yourself method is usually all it takes to fix an air mattress.
- Best Baby Sound Machine – Is Worth To Buy Update 07/2026
- How To Wake Up Without An Alarm? Effective Guide For You! Update 07/2026
- Excessive Sleepiness: Symptoms, Causes, Diagnosis, and Treatments Update 07/2026
- How To Relieve Stress For Bedtime? Effective Guide For You! Update 07/2026
- What Makes Good Night Sleep? A Perfect Guide For You! Update 07/2026
To remedy the leak, you must first locate the hole and then thoroughly clean the surrounding area. Then, seal the leak with some adhesive and plastic or vinyl patches. You can test the patch to make sure the mattress is no longer leaking after letting it sit for a few hours.
Bạn đang xem: How to Fix a Hole in an Air Mattress? Easy Step-by-step Guide Update 07/2026
Throughout this guide, we’ll go over the particular products and steps you’ll need to fix your leaky air mattress yourself.
How to Patch an Air Mattress?
In order to patch an air mattress, it simply requires a few simple procedures and some common household items. Once you’ve gathered everything you’ll need, proceed as follows:
1. Locate the hole
2. Clean the surface
3. Patch the hole
4. Apply pressure and allow to cure
5. Test seal
Some of these steps are more difficult than they appear to be. Finding a minuscule rip in an air mattress, for example, isn’t always simple. Precision and patience are needed to fill in the gap. All in all, if you follow these procedures, you’ll be able to get back to sleeping on your air mattress again.
Materials and Tools You Will Need
- When it comes to identifying the leak and cleaning up the patched-up area, dish soap or detergent works well.
- Air mattress cleaning with a sponge or towel that has been dampened is an option. It is also useful in the search for the hole.
- Placing a single tissue or paper towel on the mattress helps you to see if any air is escaping.
- Many air mattresses come with a manufacturer’s patch kit. Patches that match the material of your air mattress are usually included with these kits.
- There are a variety of other patch kits available, including those sold online and at brick-and-mortar businesses, if your air mattress didn’t come with one. The materials in these kits are the same as those found in the original manufacturer’s kit. Consider purchasing a set that includes patches in the same color and material as your air mattress.
- If you don’t have a kit handy, you’ll need to make a patch out of thin plastic. You don’t need much more than a shower curtain liner or other sturdy plastic.
- In the absence of a patch kit, you will require an adhesive. Make sure to use a strong adhesive, such as one designed for plastic or one that dries airtight.
- In order to provide the patch time to cure and attach, place a flat, heavy object on the mattress after applying the patch Use a book or a box stuffed with heavy objects as a substitute.
How to Fix a Hole in an Air Mattress?
Step One: Locate the Hole
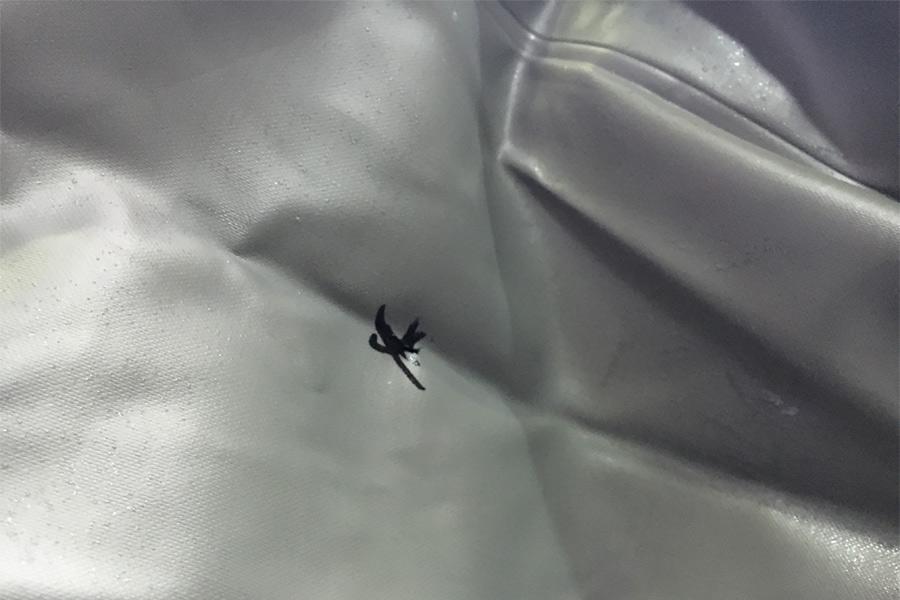
Even if you can see a leak in your air mattress, finding the source of the leak might be a challenge. You can take a few steps to find the leak.
To begin, inflate the mattress and place it flat on the ground. You can visually inspect it for any damage once it’s inflated In the event that you notice any marks or blemishes, use your palm to feel for air that is leaving. If you find a hole, don’t overlook the seams or the air intakes either.
If there are no obvious problems, run your palm over the entire mattress to see if you can feel any air escaping. Place your ear against a flat surface on top of the mattress. Listen for the squeaks of a leaking air supply.
You can also use a piece of paper towel or a single piece of tissue. Place the tissue on the air mattress, starting at one corner. Gently press down on the mattress and blow air into that particular corner to complete the process. Using this technique, move the tissue around the mattress and blow air on it as you go. You may tell whether there is an air leak by the way the tissue blows upward.
Finally, there is the option of using soapy water. A light cleanser and a damp sponge or towel are all you’ll need for this. Cleanser should be applied to a sponge with some friction until bubbles form. Wipe the sponge over a certain section of the mattress, then press down on the sponge to help guide the air in that spot. You’ll know you’ve discovered the hole if you witness expanding bubbles.
Step Two: Clean the Surface
It’s advisable to clean the area before applying the patch and adhesive to make sure they stick. Moisten the area around the leak with a wet cleaning cloth and apply tape to stop the leak. Then use a damp towel to gently scrape the surface with a mild detergent or dishwashing liquid.
Xem thêm : How To Make Blackout Curtains? Helpful Information Update 07/2026
Wipe the soap from the mattress with the cloth you just rinsed off. Before attempting to patch the hole, allow the surface air to dry fully.
Step Three: Patch the Hole
Make sure to follow the manufacturer’s directions if you’re using a third-party repair kit.
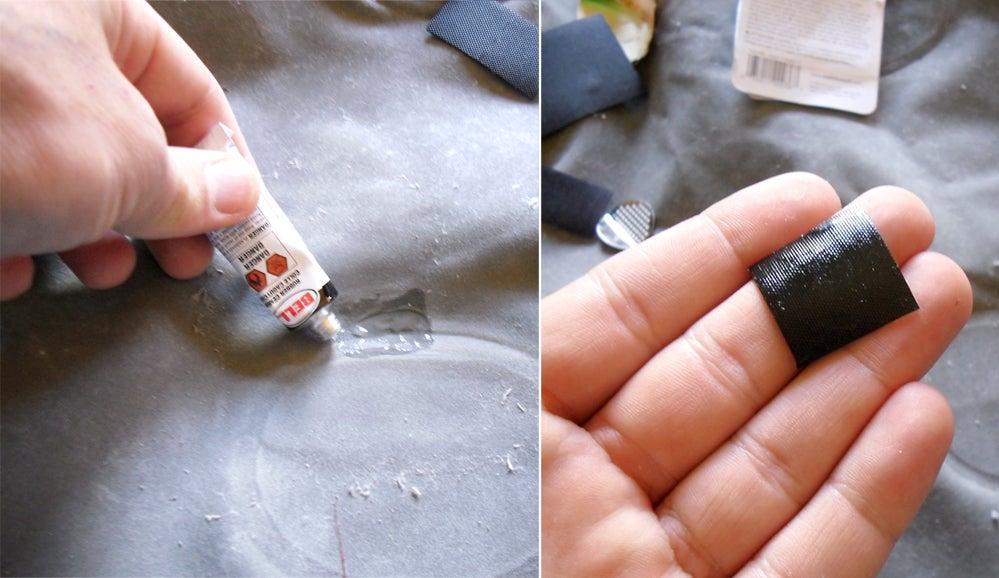
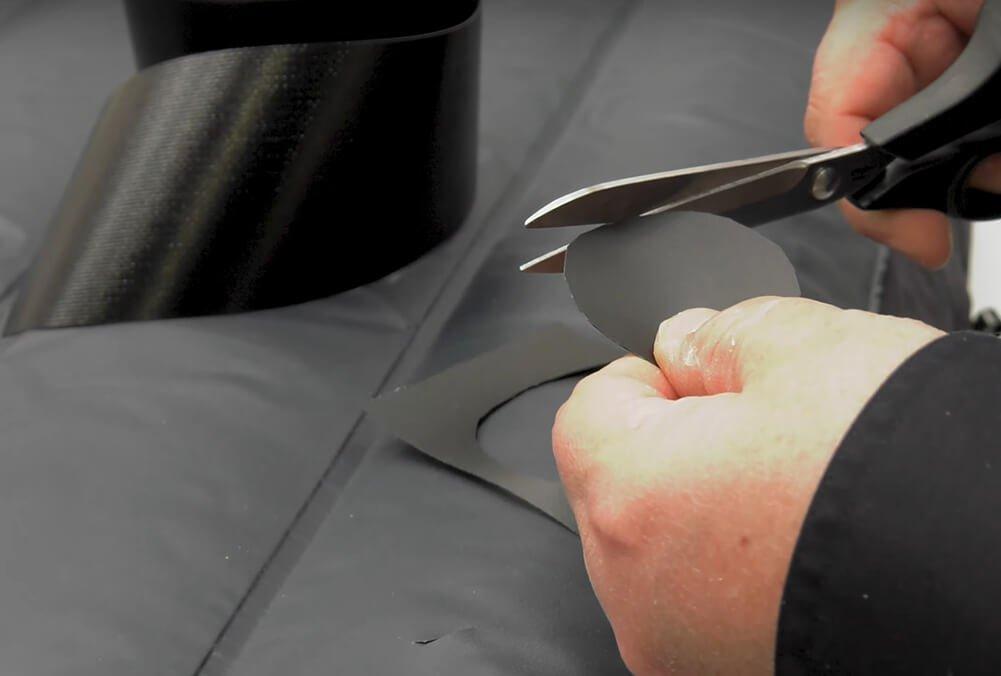
Deflating the mattress is the first step in repairing the leak with household items. It should be placed on a flat surface with the hole facing outward. Cut a piece of plastic material into a patch. In general, the patch should be large enough to cover the hole completely, plus an additional half-inch of plastic all around it.
Apply a thin layer of glue to the patch’s outer edge. Place the patch over the hole in the air mattress and press firmly. This could cause a new hole to appear the next time you inflate the mattress if adhesive seeps down into the mattress’s bottom layer.
Step Four: Apply Pressure and Allow to Cure
Applying pressure and allowing the patch to set are essential to ensuring that the patch is secure. The patched area should be supported by a flat, heavy object like a book or box. This will prevent the patch from slipping and ensure that the glue adheres completely to the surface. Make sure there isn’t any extra adhesive on the patch’s edges, or the mattress may stick to the heavy object.
Remove the hefty object and check the patch on your air mattress after about 8 hours.
Step Five: Test Seal
The next step is to test the seal once the patch has been applied and has time to adhere. This will prevent the air mattress from collapsing the next time you use it because the leak has been corrected.
The mattress should be fully inflated at this point. Simply place it where you want to direct airflow toward the patch by pressing down on it. Find any escaping air by touching or listening. After a few minutes of lying on the mattress, check to see if the seal is loosening. An air leak has been repaired if there is no sign of it now.
Try to remove the patch and then follow Steps 2 through 5 again if you feel any air escaping. A second hole may be present if the patch appears to be holding, but the mattress continues to lose air. To fix the second leak, start at the beginning and work your way backwards.
How to Fix a Leaky Air Mattress: Step by Step
1. Confirm the leak
You must first verify that a leak exists before attempting to repair it. It’s normal for air mattresses to lose air over time, although this process can be sped up by temperature fluctuations and other causes.
Make sure your air mattress is fully inflated before you start looking for the cause of the leak. For a few minutes, sleep on it and observe if it deflates. As soon as you observe a noticeable loss of air, it’s time to go on to the next phase.
2. Locate the source
Xem thêm : How Long Can A Baby Sleep In A Bassinet? Complete Guide Update 07/2026
A little rip or hole in the vinyl of an air mattress is frequently the source of an air mattress leak. A gasket may also be the source of a leak in specific situations. After then, it’s a matter of figuring out where it’s coming from.
In most cases, finding rips and tears is a snap. There are a few ways to deal with smaller holes. Put your mattress upright against a wall, with the bottom facing you, after it has been fully inflated. Keep an eye out for any signs of damage to the surface. Seams are a common place for minor cracks to occur. Listen for the sound of air departing the mattress by gently pressing on it.
As a last resort, head to the kitchen if you can’t find the leak by following these instructions. Squeeze out as much water as possible from a clean kitchen sponge after rubbing it in dish soap. Inspect the air mattress for bubbles as you work the sponge over the surface. Larger bubbles indicate that the leak is originating from a specific location.
3. Clean & mark the leaky area
Once the leak has been discovered, carefully clean the area. Allow it to totally dry out in the open air. To keep track of where the leak is, use a marker to draw a circle around it.
To ensure that a patch adheres well, the surface must be as smooth as possible. To smooth down the surface of an air mattress that is bumpy or ribbed, use fine or very fine sandpaper.
4. Patch the leak
Once the affected area has been thoroughly cleaned and dried, the leak can be patched. Listed below are a few of the most successful techniques to accomplish this:
- Using the air mattress patch kit that came with it.
- Air mattress patch kits can be purchased online from a third party.
- Using a tire patch kit for bicycle tires.
- The patch can be constructed from a shower curtain or other thin plastic material.
To use a patch kit, simply follow the directions provided by the manufacturer. Because of the magnitude and severity of the leak as well as the patching material, you may have to improvise a bit if you decide to go the DIY route.
Applying a patch to a leaking air mattress can be done as follows:
- Seal the air mattress when it has been completely deflated.
- Make sure the area around the leak is thoroughly dry and clean.
- Use a flat surface and full exposure to locate the leaky spot of the mattress.
- In order to ensure a half-inch of coverage on all sides of the leak, apply a patch to the area in question.
- An adhesive bandage patch can be applied directly to the leaky area if the patch is made of this material.
- A strong glue or adhesive must be applied to the patch perimeter before application if you’re utilizing a basic patch.
- Place a flat object on top of the patch to keep the edges from curling up.
- Allow at least eight hours for the patch to dry.
- Make sure there are no leaks when you carefully inflate the mattress.
Your air mattress can be repaired by following these instructions. Once the damage has been repaired, take important to check the patch often to make sure it isn’t coming undone. If the patch seal starts leaking again, you may have to repeat the procedure.
Frequently Asked Questions
How do you find a leak in an air mattress?
To find a leak in a fully inflated mattress, dab a soapy sponge on the surface. Be on the lookout for any spots where bubbles begin to form and grow. Another option is to blow up the mattress to capacity and listen for the sound of air exiting. The mattress can be submerged in water to look for escaping bubbles, although this is impractical for a large mattress.
How do you fix an air mattress without a patch?
You’ll have to make one if you don’t already have one. Shower curtain liners, which are made of thin, flexible plastic, are ideal for this project. Make a patch the same size as the leaky spot, leaving about a half-inch of material on all sides. Pick an adhesive and apply it to the patch’s perimeter. A patch can be applied to a deflated air mattress after it has been thoroughly cleaned and dried.
How do you fix a leaky gasket or seal?
To fix an air mattress leak, you may need to remove the gasket. To determine if a fix is stated in the mattress owner’s manual, see if you have one or can locate one online. A faulty gasket frequently need a complete replacement.
How do you fix a leaky seam?
It is unlikely that a patching strategy will work if your leak is originating from a seam. As an alternative, you can use a hot glue gun or a strong glue to fill in any gaps that may be present. If the tear is significant, you may have to glue the edges together by folding the surrounding material in on itself. When using a hot glue gun, use extreme caution because the metal tip’s heat can melt the air mattress’ surface.
Nguồn: https://www.sleepyheadpillowcase.com
Danh mục: Sleep Advisors